Text on a path
Path text is a variation of Artistic text which follows a line, curve or outline of a shape.
Path text is a variation of Artistic text which follows a line, curve or outline of a shape.
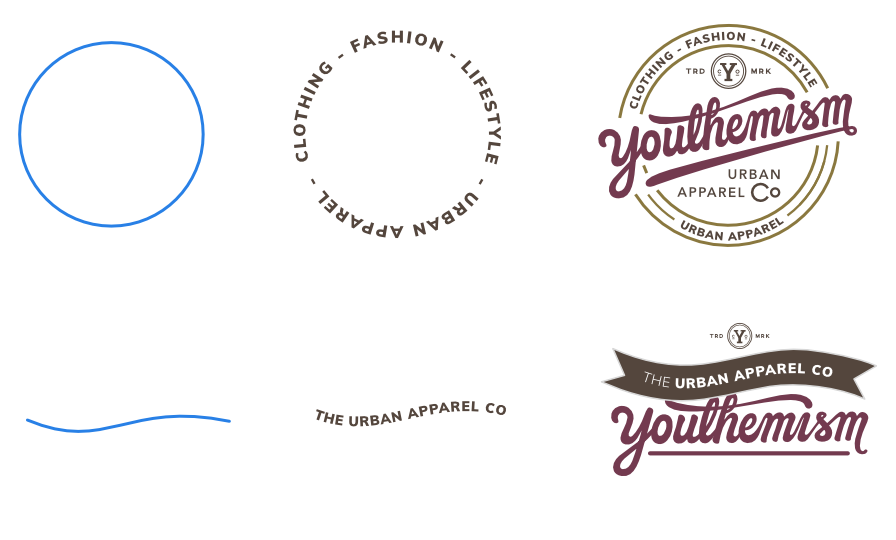
Applying text to a path allows you to explore a whole range of diverse typographical designs. The path can be created from any line, curve or shape drawn using any of the line or shape tools. These include, but are not limited to, the Pen Tool, Pencil Tool, and Ellipse Tool. The only criterion is that a line, curve or shape must exist on the page before path text can be implemented.
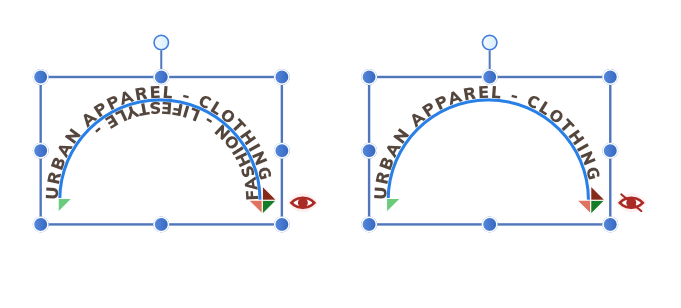
Once the path has been created, you can adjust the start and end handles on the path to expand or restrict the portion on which text will flow. The start and end handles are indicated by light green and orange triangles, respectively.
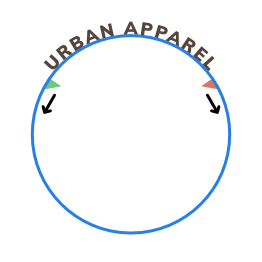
If path text extends beyond the start and end handles, it will flow onto a second path (below) or wrap around to follow the path in the opposite direction. If this occurs, an additional pair of start and end handles (colored dark green and red, respectively) will become available so this new path can be adjusted separately. Both paths and pairs of handles work identically.

You can also control the distance between the text and the path (i.e., the Baseline) and the direction in which the text flows along the path. Each path section can have a different Baseline value.
You can reshape the path object at any point using the Node Tool. If your text path object originated from one of the shape tools, you can modify it as if it was still the original geometric shape. Text already present on the path will reflow along the changing path when the object is reshaped.
For more information on reshaping a path object, see the Edit curves and shapes and Draw and edit shapes topics.
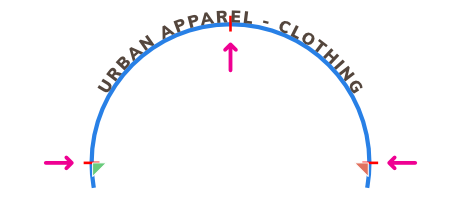
Along the path you'll encounter red perpendicular snapping lines as you drag path text handles. For example, on path text around an ellipse, you can snap to 90° intervals on its circumference, then use text alignment options to precisely position text centrally.
Any path text extending beyond the end handle of a secondary path will be displayed by default, but you can hide this, e.g. for editing, by clicking the strikethrough red eye icon.
With the path text selected, do one of the following:
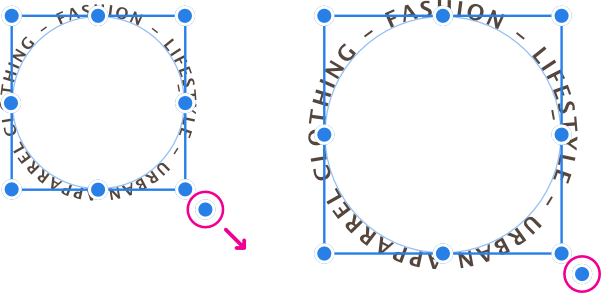
When resizing a path object you can control whether:
With the path object selected, do one of the following:
To resize height and width independently, drag the object's side handles.

With the path object selected, drag the object's scale handle (extends from the bottom-right corner of the selection).