Draw and edit shapes

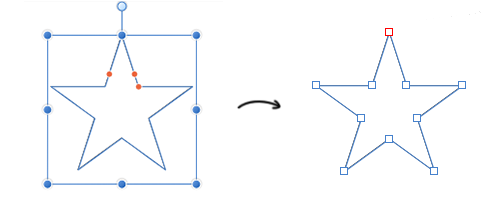
Geometric and other special shapes that would be otherwise hard to draw can be easily created using one of the corresponding shape tools. Once drawn, both the shape and its stroke can be made into curves for more freeform design.

Shapes example

Rounded Rectangle To draw a new shape:
  1. Choose one of the shape tools, e.g., Rounded Rectangle from the Tools panel.
  2. Drag on the page to create the shape and use the modifier to constrain the shape's proportions if needed.
    Drag shape
  3. Modify options as required, either by changing the values on the context toolbar or by dragging the red handle(s) (if available).
    Drag handle
To reset a shape handle to its initial position:
Node tool To edit an existing shape:
  1. Click the Node Tool.
  2. Select the shape, either by clicking the shape or by clicking the layer entry in the Layers panel.
  3. Edit the shape as required by either by directly dragging the red handle(s), or by changing the values on the context toolbar.
Select tool Node tool To convert a shape to curves:

The shape is now made from curves and the Node Tool is automatically selected. Segments and nodes can be modified with the Node Tool.

Presets

Presets can be applied to shape tools from the context toolbar. These allow you to take variations of standard shapes and reuse them instantly. A number of master presets have been supplied, but you can also create and define your own presets using the Presets Manager.

Presets Icon Preferences To apply tool presets:
  1. Select the shape you wish to access presets for.
  2. From the shape's context toolbar, click the Presets icon.
  3. A pop up panel containing a list of available presets for the shape will be displayed. By clicking on a preset, you can apply it to the selected shape.
Presets Icon Preferences To create new custom tool presets:
  1. Select the shape you wish to create a new preset for and edit it to your liking.
  2. From the shape's context toolbar, click the Presets icon.
  3. From the pop up panel, select Create Preset from the preferences menu. Enter a name and category for your new preset, then click Create.
Presets Icon Preferences To manage tool presets:
  1. Select the shape you wish to access presets for.
  2. From the shape's context toolbar, click the Presets icon.
  3. A pop up panel containing a list of available presets for the shape will be displayed. From this panel, select Manage Presets from the preferences menu.
  4. The Preset Manager will be displayed. From here, you can do the following:
    • Drag and drop preset thumbnails into an existing category to move them into that category.
    • Right-click on a preset to rename it, delete it, export it, or revert any changes you have made to it.
    • Click on a category menu to rename it, delete it, restore master presets to it, import user presets directly to it, or export presets from it.
    • To create a new preset category, select Create Category and enter a name for your new category.
    • To return all master presets to their original uncategorized state, select Restore Master Presets to Category.
    • To export any user defined presets from the Presets Manager, select Export User Presets. Type a name for the exported file along with any tags you would like it to have, choose the disk location you want to save it to and click Export or Save.
    • To import presets to the Presets Manager, select Import Presets. Locate the .aftoolpresets file you want to import and click Import.
    • To view presets for a different shape, select the shape from the Filter: menu.

SEE ALSO: