To draw freehand lines with the Pencil Tool:
- Drag on the page in the direction that you want the path to follow.
- (Optional) On the context toolbar, do one (or more) of the following:
- Enable Sculpt to reform or continue a previous pencil stroke.
- (Optional) Enable a Stabiliser to smooth the stroke using different smoothing behaviours.
- (Optional) Enable a Controller to have the stroke respond automatically to Apple Pencil's Pressure input or speed of finger movement (Velocity), or manually to the Stroke Studio's Pressure profile chart (None).
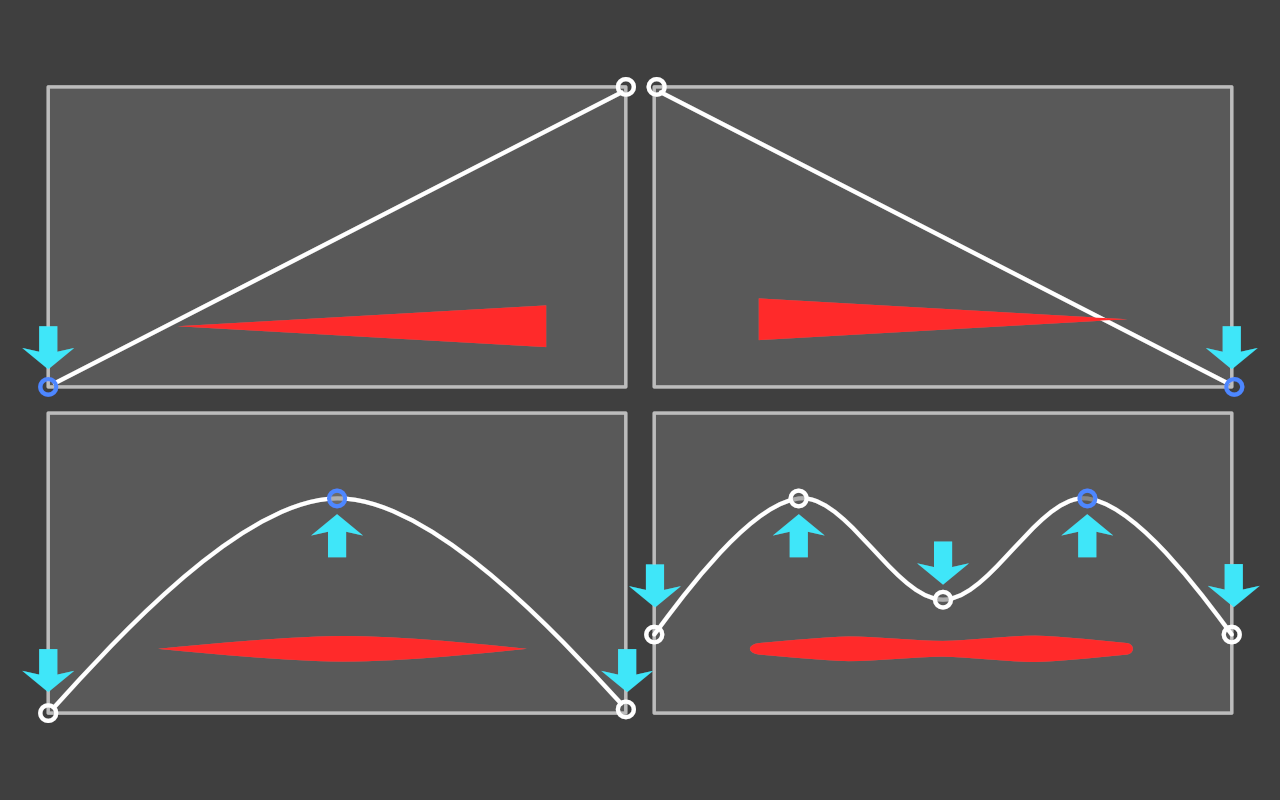
Stroke stabilisation and pressure sensitivity
Affinity Designer's stroke stabiliser smooths pencil lines as you draw, helping you to produce some really great effects.

A Rope stabiliser or Window stabiliser mode can be used; the former drags the stroke end by a 'rope' to smooth the stroke, but lets you introduce sharp corners at increasing rope Length (radius) values by redirecting the slackened rope; the latter will smooth the stroke by averaging sampled input positions within a Window whose size is configurable.
The stroke's variable width lines can be controlled either by velocity or by pressure—the latter comes in particularly handy when drawing with a pressure-sensitive tablet pen.
To simulate pressure-sensitive pencil strokes:
- On the Stroke Studio's pressure profile chart, select an end node on the profile's line and drag it vertically to a new position; nodes can be added by tapping on the line and then positioned freely to form a curve.
- Repeat for other nodes as needed.