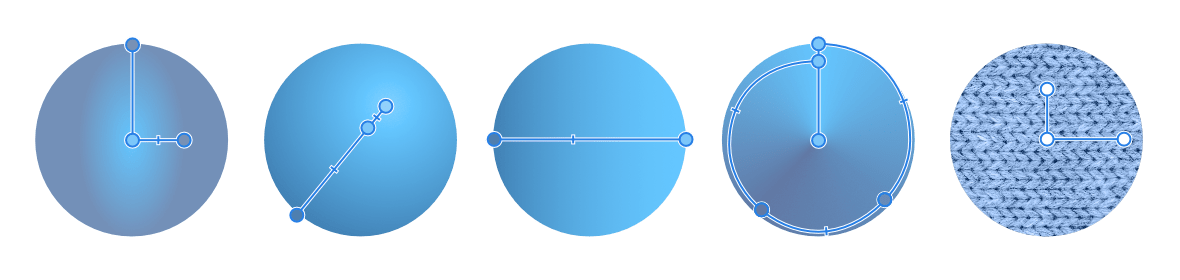
Gradients

The Gradient Tool lets you draw a simple color gradient across your object. The created fill path can be edited directly on the object to introduce more than two colors along the gradient path, introduce opacity, noise, reposition added colors or control color transitions.

Color gradient example
(From left to right) Elliptical, Radial, Linear, Conical, and Bitmap fill types applied to a basic shape.
Gradient Tool To draw a gradient:
  1. Select an object.
  2. Select the Gradient Tool.
  3. From the context toolbar, select either Apply to Fill or Apply to Stroke, and choose a gradient Type.
  4. Drag the cursor across the object. This can be outside the object to start with.
  5. Change the color, opacity or noise of the selectable end stops using the Color panel. Selected stops display larger than other stops.
To create a bitmap fill:
  1. With an object selected, select the Gradient Tool.
  2. From the context toolbar, select Bitmap from the Type option.
  3. A file browser window will appear, allowing you to select a file to be used as a bitmap fill. The image will be scaled to fill the selected area.
  4. Drag to reposition the fill origin, or drag on either axis nodes to adjust the scaling and rotation of the bitmap. Hold down one finger to constrain the angle to 45°.
To create a bitmap fill from assets or stock images:
  1. Select an object.
  2. From the Publisher Persona, select the Gradient Tool.
  3. Do one of the following:
    • For assets: from the Assets panel, tap your chosen asset's thumbnail and select Set as Fill.
    • For stock images: from the Stock panel, tap a chosen image.
  4. Tap and drag to reposition the fill origin, or drag on either axis nodes to adjust the scaling and rotation of the bitmap. Hold down one finger to constrain the angle to 45°.
To modify a gradient:

With the Gradient Tool selected, select the object with a gradient fill applied and then do any of the following:

SEE ALSO: