Every document possesses at least one page. This initial page belongs to the first section.
Sections are numbered but can also be named. The name of a page's section can be automatically displayed on the page by inserting fields—for example, into a master page's footer and applying the master page to publication pages.
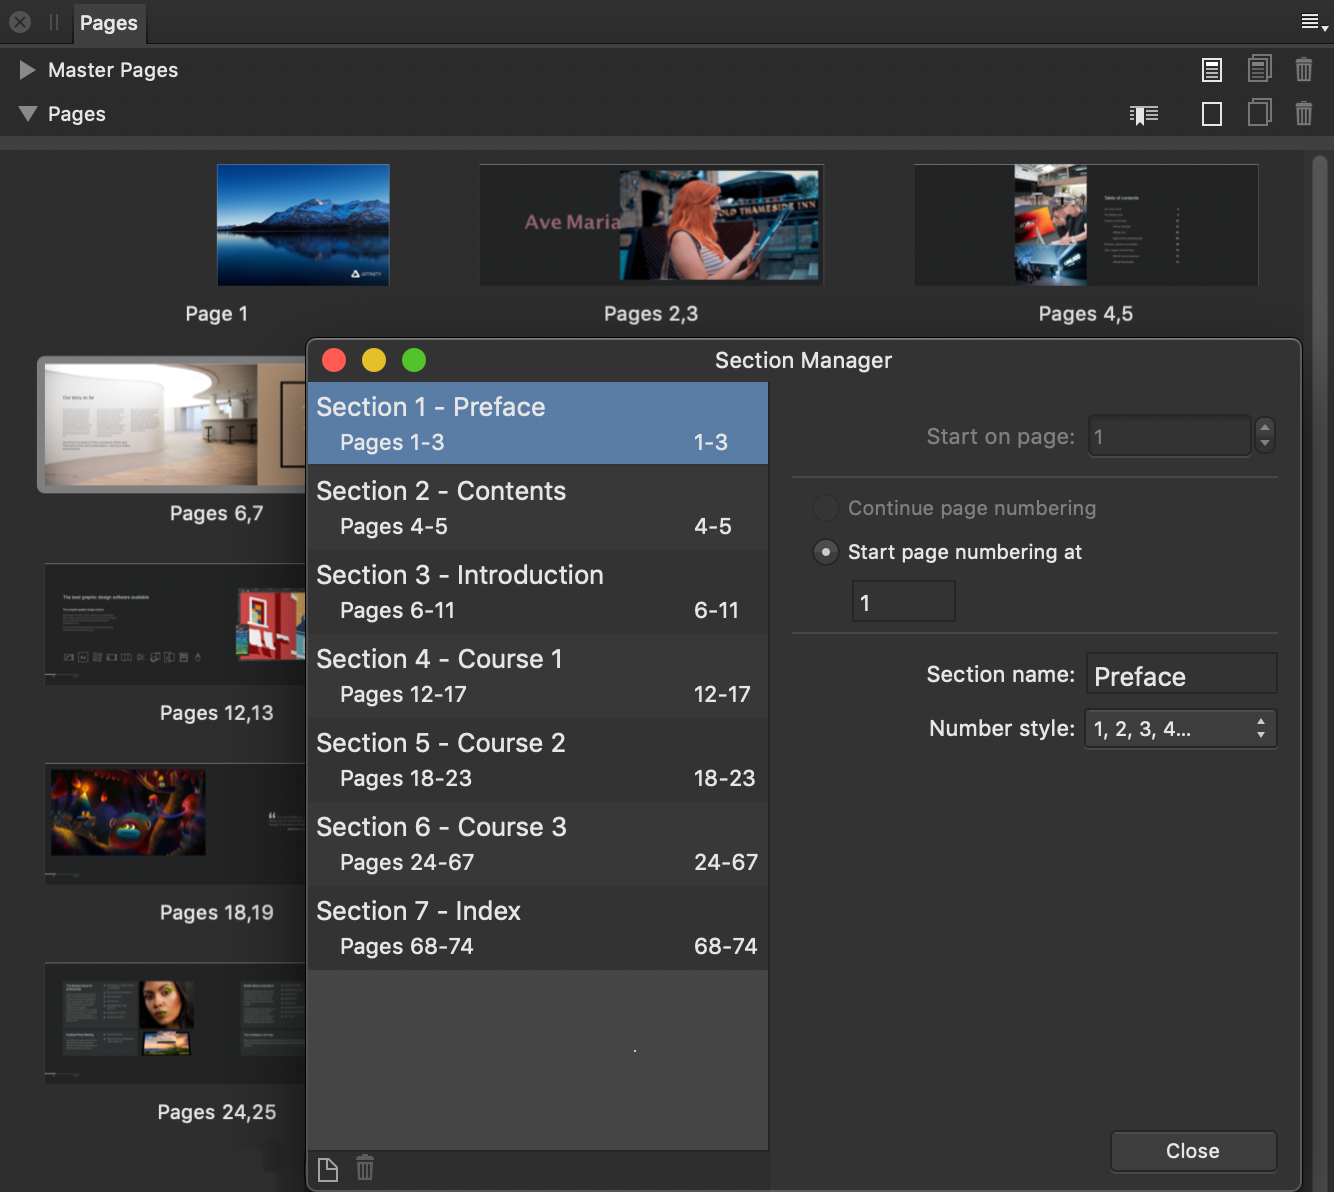
Section page numbering and the Pages panel
When a section's starting page number is customized, related thumbnails on the Pages panel are labeled with two groups of numbers, e.g. Page 1 (33) or Pages 16,17 (20, 21).
Numbers outside brackets are document page numbers, i.e. they represent page numbers within your Affinity document. They always start at 1.
Numbers inside brackets are publication page numbers. They are calculated from the starting page number of their section, and replace Page Number fields when your document is exported or printed.
Sections and hyperlinks
Hyperlinks in PDF publications help the reader to navigate to specific content. A hyperlink can take the reader to a page number, a section's starting page, or an anchor attached to an object.
When linking to the first of a group of related pages, it is best practice to create a section that begins on that page and set the hyperlink's type to Section. If you add or delete pages, Affinity Publisher automatically updates hyperlinks of this type to reflect pagination changes and their impact on section starting pages.
In contrast, hyperlinks whose type is Page are static references; each one's target page number is unaltered by pagination changes and needs to be manually updated.
Exporting and printing sections
Normally, every section is included when your document is exported or printed.
You can manually exclude any section. For example, you may not want a publication's cover or a draft section to be shared with a specific recipient.
Any chapter that will be used as a book chapter and contains endnotes positioned at End of Book contains those notes’ bodies in a #Booknotes section at the end of its document. When outputting a book, the content of such sections is consolidated at the end of your book. The #Booknotes sections are excluded from the output to avoid the bodies appearing twice within your book.
When outputting a chapter's document individually, its #Booknotes section can be included in the output by temporarily changing a setting for the section.