Snapping for accurate crop and selection areas
To precisely create the above areas you can use snapping to position to previously placed guides or to the page edge itself.
Simply drag out your crop or selection area until its edge meets the positioned guide.
Snapping for vector lines, shapes, and text
Snapping causes images, brush strokes, lines, shapes, and selection areas to align to nearby grid lines, guides, margins, or spreads, or any combination of these. You can also snap to object bounding boxes, key points on shapes and to an object's geometry. Text can also snap to the baseline of other text (the first line only for text frames).
To help understand snapping behavior, colored dynamic guides and target nodes display when you snap to objects. The colors used are:
- Red line: Object snaps to target horizontally.
- Green line: Object snaps to target vertically.
- Yellow node: Object snaps to shape's key points horizontally and vertically.
- Purple node: A curve's node snaps to a shape's key points.
- Blue line: Object snaps to third plane when using triangular projection grid.
- Orange line: Object snaps to target horizontally or vertically if a projection grid is active.
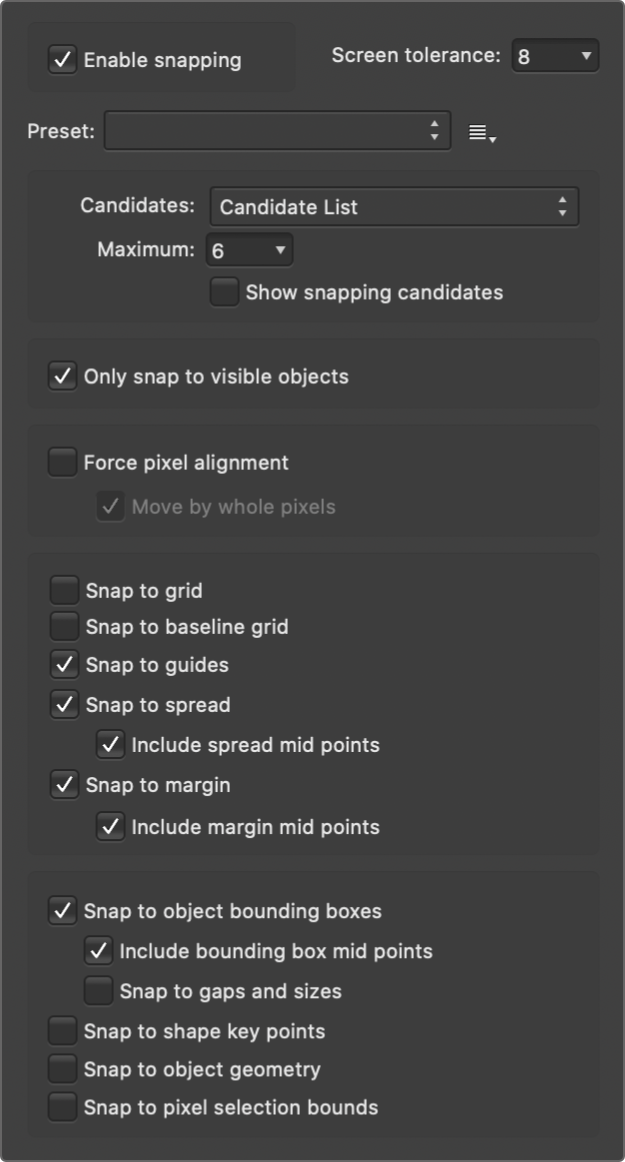
Snapping candidates
Snapping candidates are page objects which are available for you to snap to. You can set how candidates are created using the following settings:
- Candidate List—limits the number of objects which are snapping candidates to the number you set. Creating a new object, or hovering over an existing object, designates it as a snapping candidate in this case. Only the active snapping candidates can be snapped to.
- Immediate layers—limits the number of candidates to the objects on the current layer.
- Immediate layers and children—limits the number of candidates to the objects on the current layer and any of the layer's subordinate child layers.
- All layers—does not limit the number of snapping candidates in the document.