Linking text frames

A powerful feature of Affinity Publisher is the ability to link text across multiple text frames, either on the same page or across different pages.

Before
After

There are two basic ways to set up a linked sequence of frames:

About jump lines

Jump lines, also known as continuation lines, direct the reader of a publication to where frame text continues—usually on an earlier or a later publication page.

To help readers navigate between linked text frames, you can use the Next Frame and Previous Frame page number fields in 'Continued On' and 'Continued From' jump lines, respectively.

Jump lines automatically update if linked frames are moved to a different page or new pages are added.

Unlinked frame Linked overflowing text To link the selected frame to an existing unlinked frame:
  1. Tap the frame's triangular Text Flow button.
  2. Tap anywhere on the frame to be linked to.

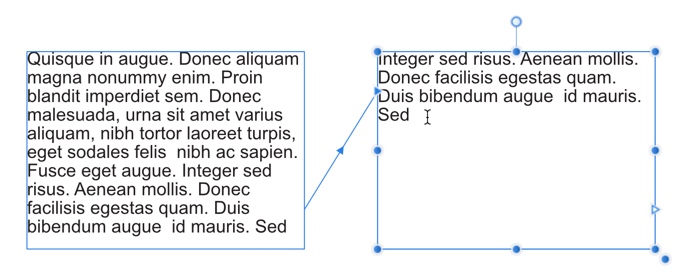
A connecting line links the two text frames.

To link the selected frame to a newly drawn frame:
To remove a text frame from the frame sequence:
  1. From the Tools panel, select the Move Tool.
  2. Select the text frame, then select Delete from the Quick Menu.

The previous and next frames will maintain frame linkage.

Linked frame To unlink a text frame from the frame sequence:
  1. Select the Move Tool.
  2. Select the text frame to be unlinked, then tap the 'previous' and/or 'next' Text Flow buttons (top left or bottom right, respectively).
  3. Tap within the blue-highlighted frame.
To insert a jump line:
  1. Make an insertion point in the text frame where you want the jump line to appear.
  2. Type the phrase for the jump line.
  3. Position the insertion point where the page number will appear in the jump line.
  4. Do one of the following:
    • On the on-screen keyboard, tap Insert, then tap either Previous Frame Page Number or Next Frame Page Number in the Fields section.
    • On the Fields panel, in the Continuation section, double-tap either Previous Frame or Next Frame.

SEE ALSO: