Layer states

Layer states, or simply states, allow you to instantly set the visibility and layer effects of multiple layers.

Before
After
Before and after a query applied: German and English language version, respectively.

There are two types of state:

States of each type can be given a name.

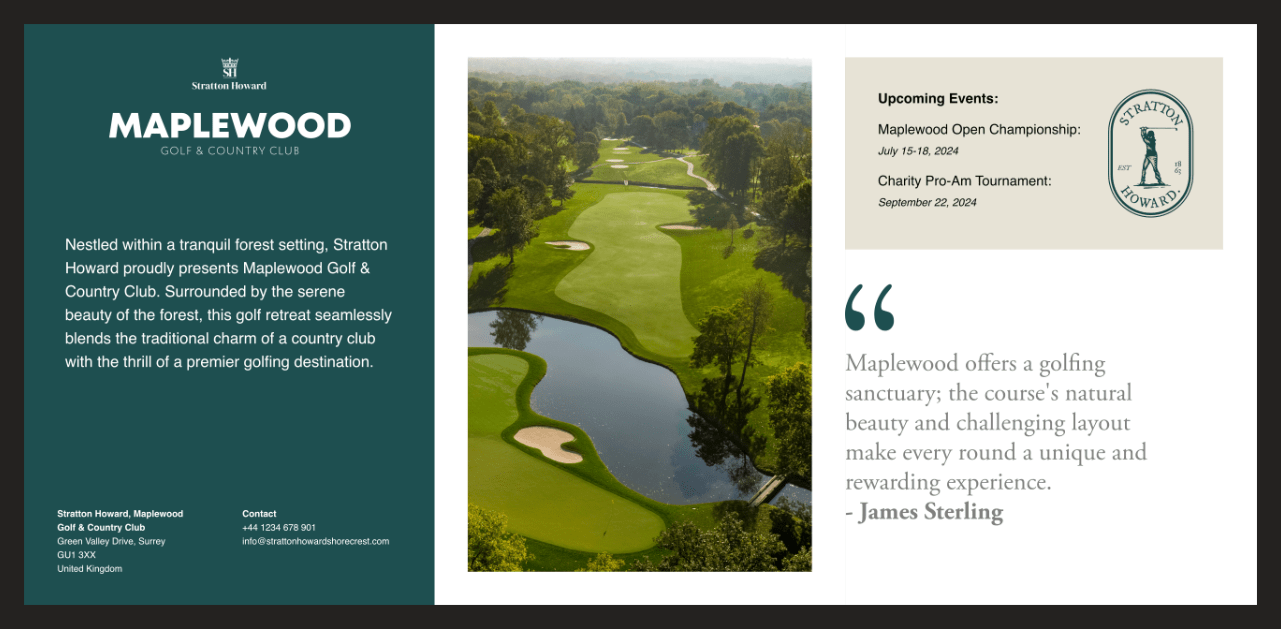
With several states or queries added to the States panel, you can quickly compare different design choices for your document, such as alternative masks, adjustments, live filters and even entirely different layer content.

Understanding state and query entries

Entries on the States panel for each type of state provide different information about how they will affect your document's layers.

A captured state
A captured state example.

Each state entry displays:

A query
States and Layers panels for the query example: before and after images at the top of the page.

Each query entry displays the query's name, and specifies the criteria that must all be met in order to set your chosen layer visibility. You can specify any combination of the available attributes. Unselected attributes are ignored.

Example scenarios

The application of states and queries can be used in a number of professional scenarios. Apart from language content previews above, more could include:

Controlling the scope of affected layers

When adding or updating a state or applying a state or a query, use the Scope setting to determine how broadly information is captured from or affects the current visibility of your document's layers, respectively.

The scope can be the whole document, the current selection on the Layers panel, or an individual spread—useful when editing certain kinds of document, such as .afpub

This allows you to focus your use of states on a specific portion of your work. For example, layers whose tag colour is orange but only if they are nested within a selected layer.

Add new captured state icon To add a state:
  1. On the Layers panel, set the visibility of your document's layers as you want them to be captured.
  2. On the States panel, set the Scope of layers whose visibility and layer effects you wish to capture to either Document, Spread or Selection.
  3. (Optional) If the selected scope is either:
    • Spread—use the page navigation bar, at the bottom left of the workspace when editing a suitable document type, to navigate to the required spread.
    • Selection—on the Layers panel, select the layers whose visibility you want to capture.
  4. Click Add new captured state.
Add new query icon To add a query:
  1. On the States panel, select Add new query.
  2. On the query's entry:
    • Select only the attributes (Layer tag, Layer type, Layer name and Lock status) that you want to include as criteria.
    • For each selected attribute, specify the values that layers must match.
    • (Optional) Select And show / hide others if you wish to set the visibility of non-matching layers to the opposite of matching layers when the query is applied.
Apply state To apply a state:
Hide state Show state To apply a query:

On the States panel:

  1. Select the Scope for layers you wish to affect.
  2. On the query you wish to apply:
    1. (Optional) Select or deselect And show / hide others according to whether you wish to affect non-matching layers.
    2. On the query you wish to apply, click Hide or Show.
State Options To set whether a state's captured visibility/layer effects will be applied:
Update state To update a state:
  1. (Optional) On the Layers panel, select the layers you wish to include in the updated state. (Layers that were not captured when the state was added will be ignored even if they are selected.)
  2. On the States panel:
    1. Select the Scope of layers you wish to include in the updated state.
    2. Click Update on the state's entry.

SEE ALSO: