About the Stroke panel
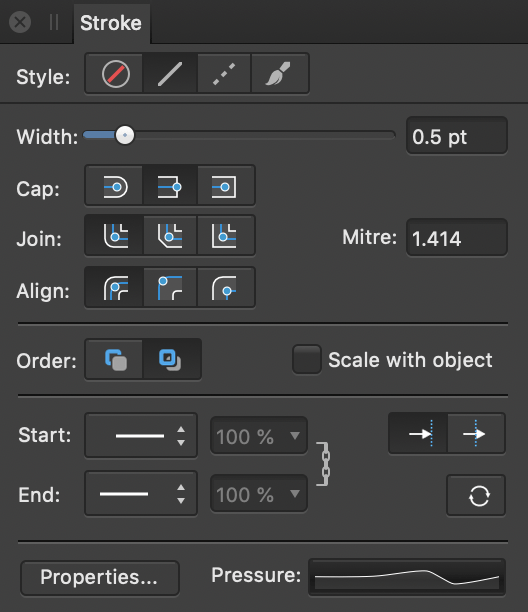
Every object can take a stroke around its selection box which can take on various properties, e.g. width, colour, opacity, line style, etc.

The following controls are found on the panel:
- Style—Select a line style button to change how the line is drawn. Choose from None, Solid Line Style, Dash Line Style, and Texture Line Style, respectively.
- Width—Drag to change the width (thickness) of the selected line.
- Cap—Select one of the cap style buttons (Round, Butt, or Square) to vary the contour of the line end.
- Join—Select one of the join style buttons (Round, Bevel, or Mitre) to determine the contour of the corner where two lines intersect, e.g on the corner of a shape outline.
- Mitre—Sets the length of the extension of Mitre joins to create either sharp or flat corners.
- Align—Select one of the align buttons to control where the stroke is placed in relation to the object edge, i.e. centered, or on its inside or outside.
- Order—Select one of the order buttons to control where the stroke is placed in relation to the object. Draw stroke behind hides the inner half of the object's outline behind a closed shape—useful with very small objects or when shrinking outlined text. Draw stroke in front always reveals the whole line.
- Scale with Object—Check to scale both line and shape together when resizing a closed shape. Uncheck to keep line width constant.
- Start/End—Select an arrowhead style for the start/end stops of the stroke from the pop-up menu. Choose where to position the start and end styles from Place arrow within the line and Place arrow at the end of the line.
- Percentage—With styles selected, you can enter a percentage to adjust the size of your selected arrowheads in proportion with the stroke width.
 Link—When enabled, the selected Start and End arrowheads are adjusted in proportion to each other, maintaining the current aspect ratio. When deselected, they can be adjusted independently.
- Properties—Click to edit the brush used as your Texture Line Style via a Brush dialog. Used when a vector brush has been applied from the Designer Persona's Brushes panel.
- Pressure—Displays your current pressure profile after applying a stroke. Clicking the profile lets you edit the profile and save it for future use.
- Dash—When Dash Line Style is selected, this option allows you to set the design of the dash (see below for details).
- Phase—When Dash Line Style is selected, this option allows you to set the starting point of the dash design (see below for details).
About Dash Line Style
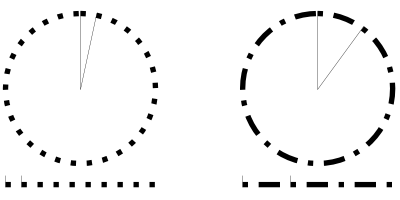
For dashed line styles, a Dash number grid appears at the bottom of the panel which sets the Dash pattern using two number pairs:
- The first two values set the size of the initial dash and subsequent space.
- The third and fourth values, when set, introduce a more complex dash pattern by setting a different size for alternate dashes and spaces.
All values are based on the current line width, e.g. a value of 2 is twice the line width.

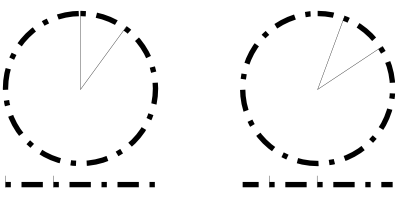
The Phase value allows you to 'shift' the dash line style along so the design begins at a different point in the style's sequence. This can have an impact on how dash lines display for closed shapes (see below).
