Multiple exposures of the same subject can be merged to produce an unbounded 32-bit document, which contains a significant amount of tonal range—more, in fact, than most displays outside of specialised equipment can reproduce. The resulting 32-bit image can then be edited with Photo's extensive set of tools, adjustments and filters, or it can be tone mapped in order to map the extensive 32-bit tonal range to a result that looks suitable for most displays.
To HDR merge several images:
From Affinity Photo's Home screen, tap the plus icon.
Choose New HDR Merge.
From the dialog, tap either the Cloud or Photos icon to locate your images.
(Optional) If you are using Photos to import images, tap Select at the top right to enable multiple selections. This means you can quickly select multiple images and add them all at once.
(Optional) Toggle Align source images if your bracketed images were shot handheld.
(Optional) Additionally, toggle Perspective alignment for less destructive alignment (more image resolution will be retained). This method of alignment may not work if the images are too far apart positionally.
Toggle Noise reduction to prevent reduction and removal of random luminance and/or colour pixels on merging.
Keep Tone map HDR image enabled to tone map the merge results in the Tone Mapping Persona as a subsequent step.
Choose OK to begin merging the images. The HDR merging is previewed in stages: first, the image alignment, then the HDR merge itself.
With Tone map HDR image disabled you will be in the Photo Persona once the merge is complete to make further edits. If you want to go tone mapping at a later date, you can move to the Tone Mapping Persona. See Tone Mapping HDR images for more information.
Alternatively to steps 1 through to 4, you can share two or more images from your library in Apple's Photos app to Affinity Photo’s New HDR Merge dialog. The first time you do this, tap More at the far right of the Share sheet's available actions, turn on the switch next to HDR Merge and tap Done to make this action available for use. Tap the action and follow from step 5 above.
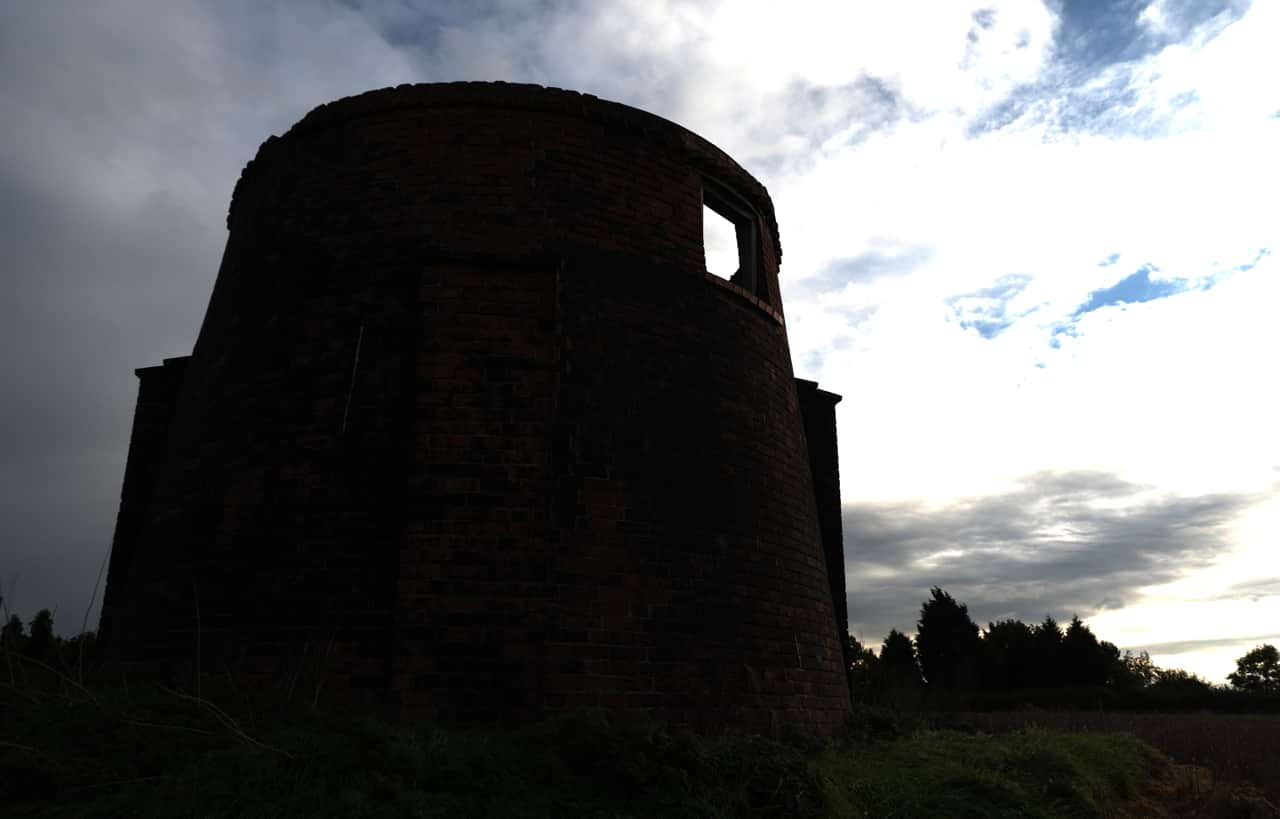
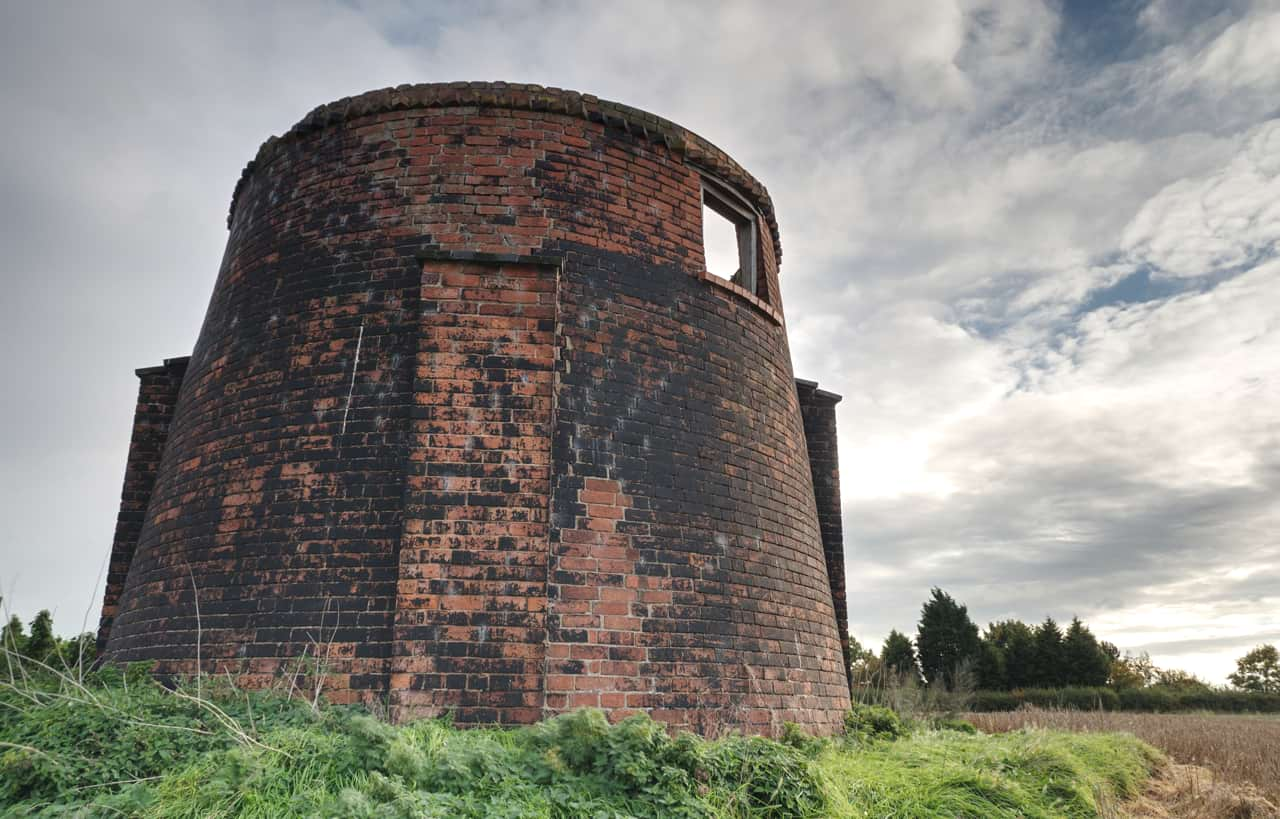
Below you will see a 32-bit image being displayed as 8-bit with no tone mapping or further tonal adjustments applied. 32-bit simply contains too much tonal range to display, so we typically apply a procedure called Tone Mapping to map that tonal information to a range that can be displayed accurately. See the topic Tone Mapping HDR images for more information.
Before: A 32-bit image with no tone mapping—the range of 32-bit is too great to display. Instead we see an image with extreme contrast. After: A 32-bit image after being tone mapped. The vast range of tonal information has been "mapped" to a range that can be reproduced by most displays.
Once work on a 32-bit image is completed, you may need to convert its colour format and, crucially, its colour profile if you intend to distribute or share it. For example, you might want to export as an 8-bit JPEG with an sRGB colour profile. Alternatively, if you are maintaining a lossless workflow, you can stay in 32-bit and export to a linear unbounded format.
To convert the colour format and profile before export:
From the Document Menu, select Convert Document and choose your desired format; for example, RGB 8-bit.
A colour profile will be automatically assigned: for RGB 8-bit/16-bit documents, this will be sRGB IEC61966-2.1.
To maintain a 32-bit workflow for importing into other software:
From the Document Menu, select Export.
Choose the EXR format, then specify a filename before exporting.

 To HDR merge several images: