The Metadata panel is a multi-functional panel for inspecting and editing information about the contents of photos.
In the Photo Persona it hosts Histogram, Scope charts (for examining image luminance/chrominance) and metadata for camera images. Most metadata is editable here.
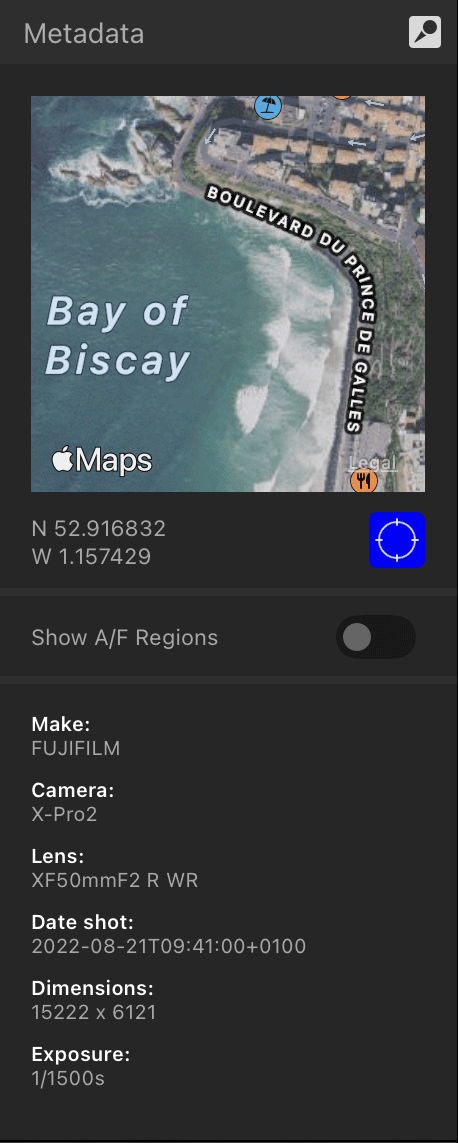
In the Develop Persona, it displays GPS location about a photo's shooting location, which can be edited.
About histograms
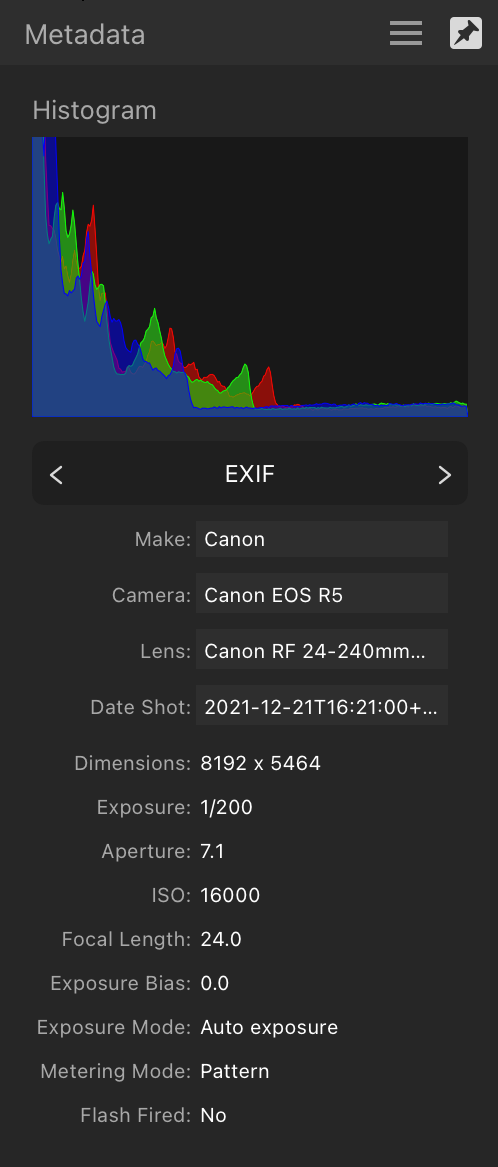
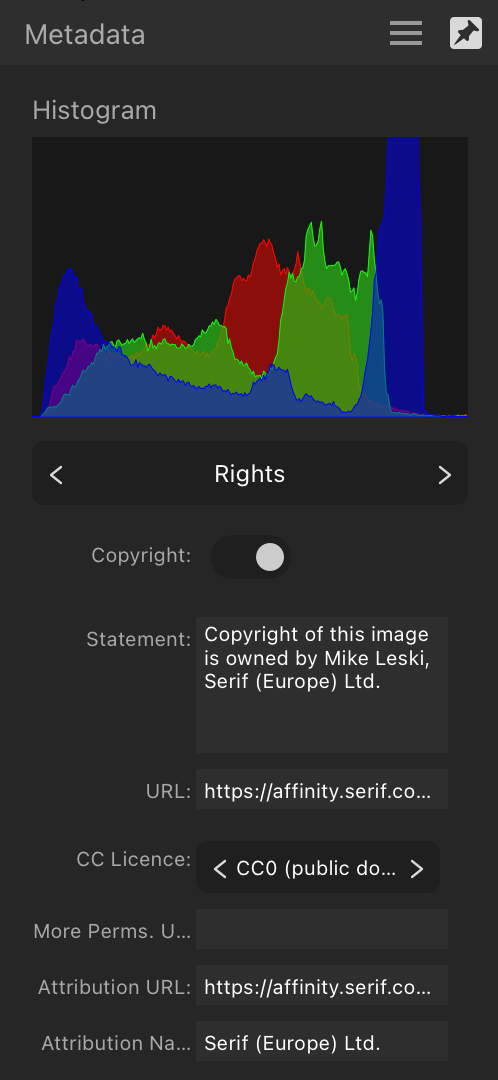
The histogram gives a valuable 'heads up' of the Red, Green, and Blue values present in your image, layer, or current selection, which is useful for deciding if color or tonal correction is needed.
The light blue values indicate the overlap of the RGB channels (not the luminosity). Purple represents where the red and blue channel representations overlap.
To display specific channels:
Select Panel Preferences, and then select a specific color channel.
To show the histogram for a selected layer or selection:
Select a layer or make a selection.
From Panel Preferences, select Current layer only or Marquee selection only, respectively.
About Scope charts
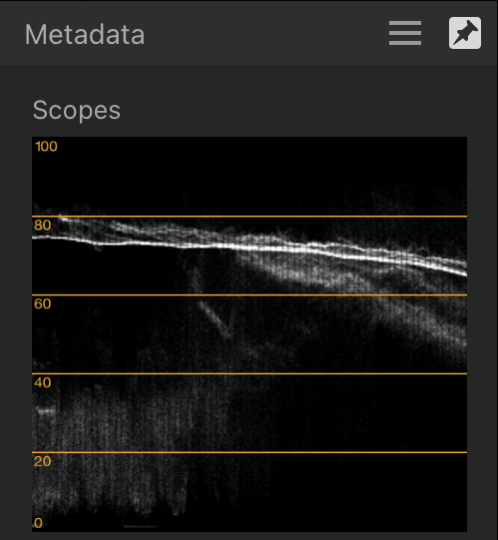
The Metadata panel also provides a variety of charts which allow you to examine the distribution of luminance and chrominance in an image, allowing you to judge whether tonal or color correction is needed. It can be used as an alternative to, or in combination with, the histogram in the same panel.
The Scope chart displaying the Intensity Waveform for the adjacent photo. To choose a Scope chart:Resource Manager panel
Select Panel Preferences, and then select a specific scope chart. Choose from:
Intensity waveform—displays a scatter plot of the luminance values of pixels in an image. The X axis gives the horizontal location of the pixel while the Y axis provides its luminance value.
RGB waveform—as with Intensity Waveform, but displays RGB rather than luminance values.
RGB parade—as with Intensity Waveform, but separated into RGB components.
Power spectral density—represents the image in the frequency domain. Low frequencies are represented as solid lines. High frequencies can be seen as speckles. The color of the frequency plot indicates the dominant color tone in the image.
Vectorscope—displays a circular chart which monitors an image's color information. Saturation is measured from the center outwards from desaturation to full saturation. The direction of the pattern indicates the image's hue.
About Metadata
You can use the Metadata panel to add new metadata to an image or edit existing metadata, and import metadata from/export metadata to an external file.
The contents of the panel's fields are saved as part of Affinity Photo 2 documents and optionally included when exporting to other image file formats.
Additionally, you can use the panel to inspect EXIF metadata that describes the hardware and shooting settings used to take a photo. Some EXIF metadata is editable in Affinity Photo 2, i.e. Camera, Make, Model, Date shot. All EXIF data can be removed in one operation.
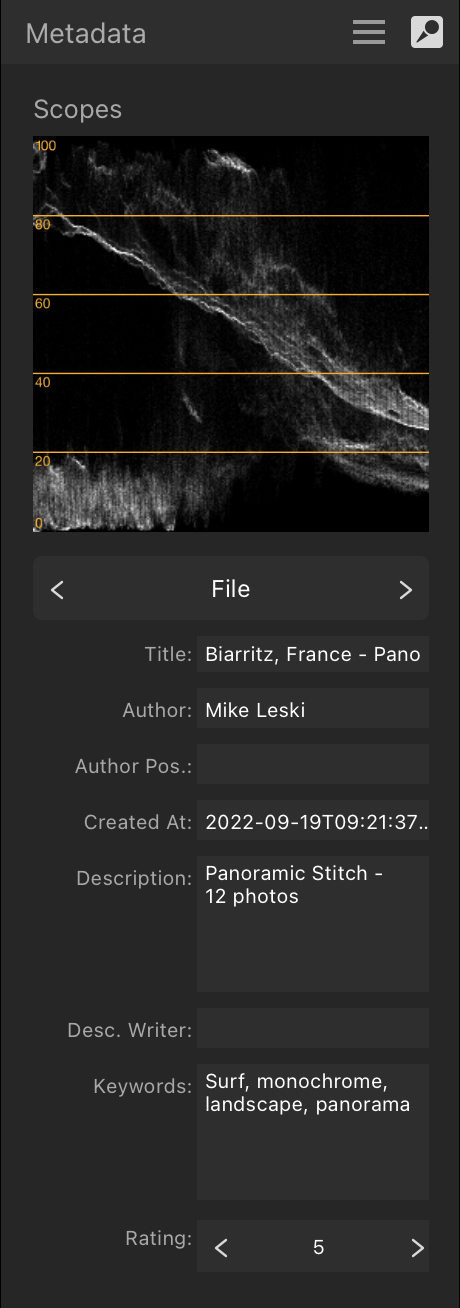
The Metadata panel showing the File and EXIF categories, left and right respectively.
Metadata categories
The panel's fields are organized into several categories. Use the pop-up menu to switch between them. The following categories are available:
File—a summary of the image's contents and creator.
EXIF—a read-only summary of the digital camera hardware and settings used to capture the image, where applicable.
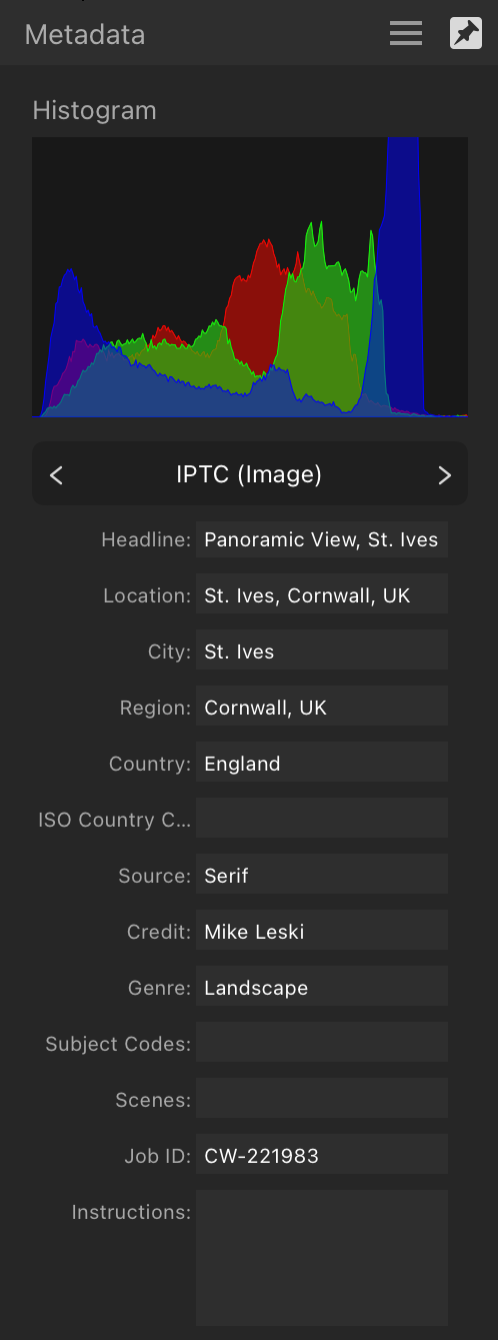
IPTC (Image)—descriptions of the content and the location depicted, the image's source (owner), the credit line to display wherever the image is used, and a job ID to help track the image through a workflow. Often used by news organizations and photo agencies.
IPTC (Contact)—the image creator's contact details, including postal and email addresses, telephone number and website. Often used by news organizations and photo agencies.
Rights—image copyright details, any applicable Creative Commons license, and rights-related website addresses.
The Metadata panel showing the IPTC (Image) and Rights categories, left and right respectively.
For additional guidance about each field's expected contents, refer to the IPTC Photo Metadata User Guide's Field Reference Table. Many fields in the Metadata panel accept freeform text; the guide contains examples of common practice.
Choosing what metadata to record
Setting metadata is optional. The following properties are recommended as the minimum to be populated:
Description in the File category.
Author1 in the File category. (The same as the IPTC attribute Creator.)
Source in the IPTC (Image) category. (The same as the IPTC attribute Copyright Owner.)
Statement1 in the Rights category. (The same as the IPTC attribute Copyright Notice.)
Credit1 in the IPTC (Image) category. (The same as the IPTC attribute Credit line.)
1 Image-based searches conducted using Google can display this metadata. Further details are available online at this IPTC article.
Ask your organization or client whether it has its own guidance on which metadata it requires to be recorded and how the data should be expressed.
Metadata in exported images
To include metadata from all the panel's editable fields when exporting a PNG, JPEG, TIFF, PSD or EPS file using the Export command on the Document menu, turn on Embed metadata.
Most EXIF data will also be included; in particular, some lens information may be omitted.
Exported PDFs include the contents of the Title, Author and Keywords fields, which you can set in the panel's File category.
To remove camera and GPS location metadata from an Affinity Photo 2 document:
Open the Panel Preferences menu and do one of the following:
Choose Strip GPS Location to remove precise location data.
Choose Strip All EXIF to remove info about camera hardware and shooting settings used in the image's creation.
To export metadata to a sidecar XMP file:
(Optional) Strip GPS location and/or EXIF metadata from your document.
From the Panel Preferences menu, select Export to XMP and then do one of the following:
Choose All to include all metadata in the resulting file.
Choose EXIF to include only metadata in the eponymous category in the resulting file.
Choose File, IPTC and Rights to export all metadata shown in those panel categories.
Set the filename and choose where to save the XMP file.
Tap Save.
To import metadata manually from a sidecar XMP file:
From the Panel Preferences menu, select Import from XMP>File, IPTC and Rights.
Browse to and select the sidecar XMP file.
Tap Open.
About Locations
For raw files only (in Develop Persona), the Location section of the panel allows you to review and set the GPS metadata of your raw image if needed.
Raw images from cameras with built-in GPS capability will show the recorded image location automatically. For all other cameras, the image location can be set manually from the panel instead.
Options
The following options are available:
Tap anywhere on the map to set the location of the pin. This information will then be integrated into your image's metadata.
Locate—sets the pin to your current location (see note below).
Show A/F Regions—when enabled, areas of the image which are within the auto focus region set by the camera, and auto focus regions which are in focus, are highlighted green and yellow, respectively.
 Metadata panel