Batch jobs allow a number of image files to be processed: specific processing instructions can be automated, boosting workflow efficiency.
About batch jobs
The Batch Job feature allows you to specify an unrestricted number of source files to process and export. Raw files will be automatically developed, and both the exported file format and image dimensions are configurable.
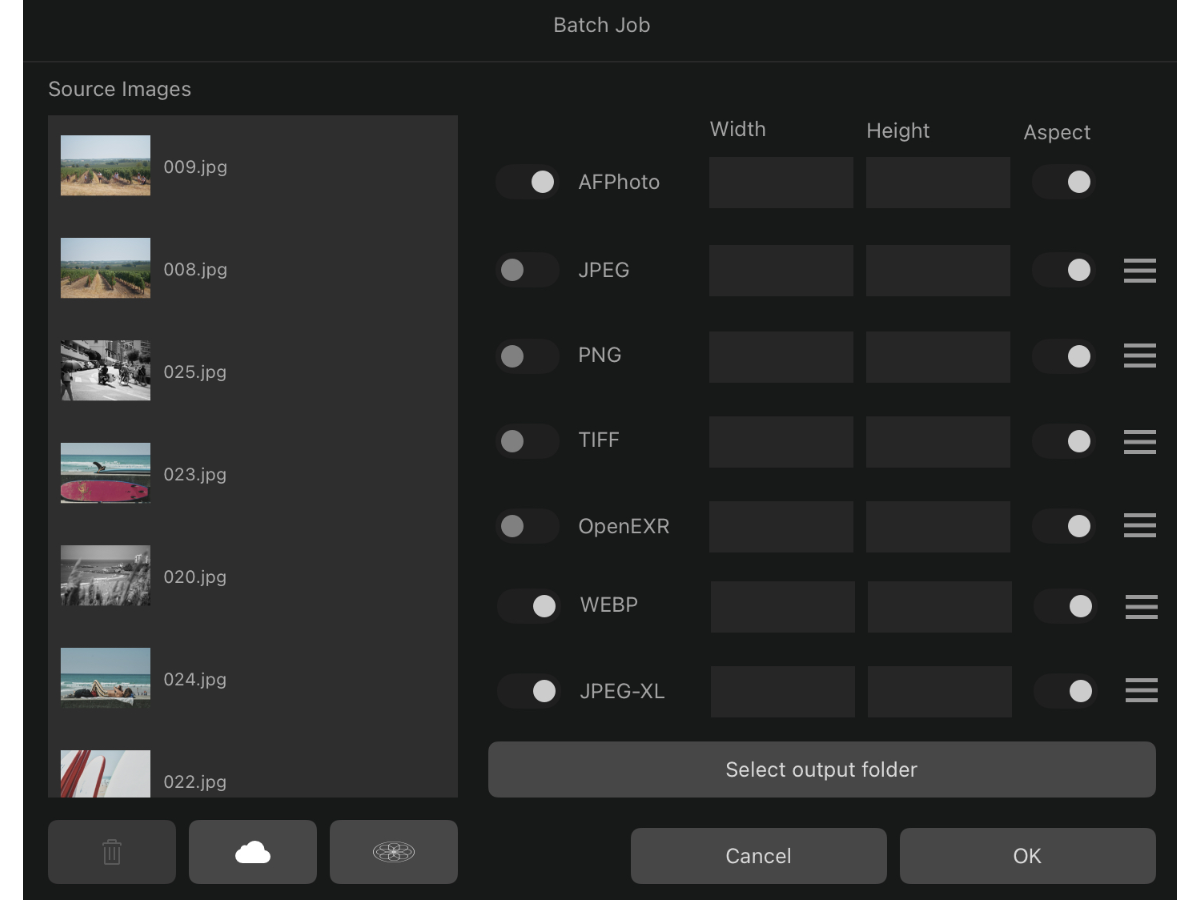
To start a batch job:
From Affinity Photo 2's Home screen, tap the New icon.
Choose New Batch Job.
Below the Source Images list, choose Cloud or Photos to bring up a file import dialog for your selected location.
Select your desired image files (including raw files) to add to the Source Images list and tap OK.
Set your Output options (see below for more information), then select OK to begin batch processing.
Settings
The following settings are available in the Batch Job panel:
Select output folder— allows you to specify a different directory to write the new image files into.
AFPhoto—writes an .afphoto version of each source image.
JPEG—writes a JPEG version of each source image.
PNG—writes a PNG version of each source image.
TIFF—writes a TIFF version of each source image.
OpenEXR—writes a 32-bit OpenEXR version of each source image.
Save as WEBP—writes a WEBP version of each source image.
Save as JPEG-XL—writes a JPEG-XL version of each source image.
Width/Height—manually enter size dimensions for the source image.
Aspect—when checked, maintains the aspect ratio of the source image.
Additional settings for individual file formats listed above are available. See Export Settings for more information.