About a histogram
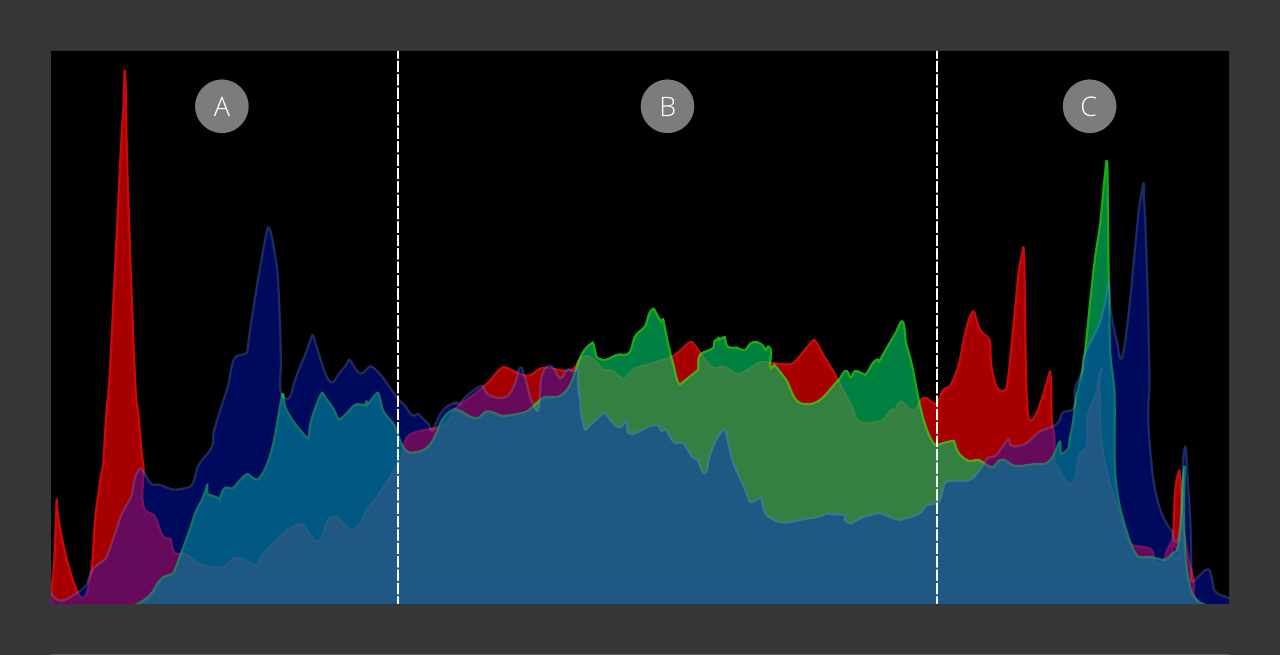
A histogram is divided into three areas representing the tonal values of an image: the dark tones readout appears on the left, the midtones in the center, and highlights on the right, as pictured above.
You may have come across the term "shoot to the right", meaning the correct exposure presented by the graph to take the form of evenly growing values from the shadow areas (left) towards the highlights (right).
Although that may be a great starting point, it isn't always possible. Additionally, the photographer's creative vision might vary from what technically is regarded as correct exposure. Don't be afraid to experiment to arrive at your intended output. For example, try changing your camera's shutter speed, aperture, and ISO settings to achieve the following effects:
- The histogram with the graph pushed to the left for dark and moody photos.
- The histogram with the graph pushed to the right for light and airy photos.
Dark and Moody
Light and airy
Why use a histogram?
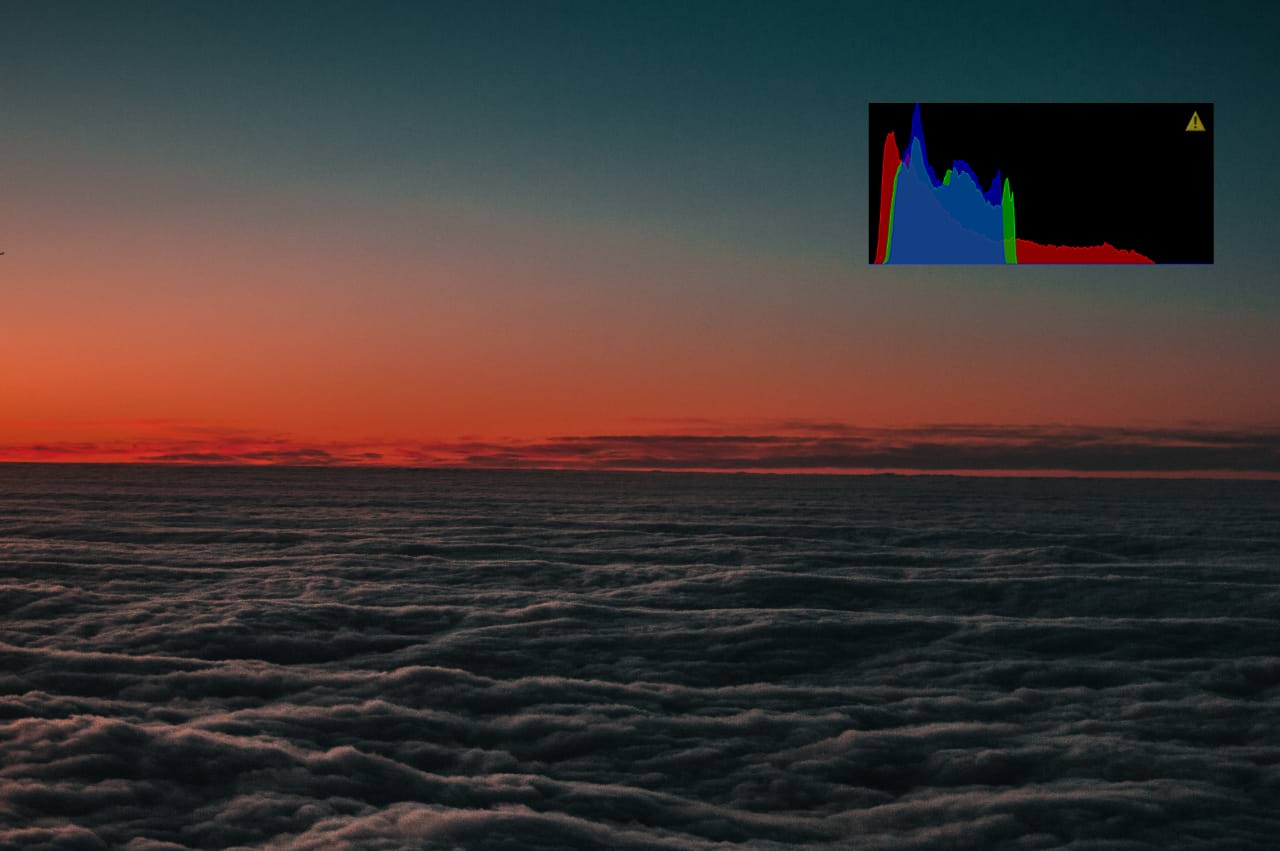
Relying on the histogram readout aids in capturing images in challenging lighting conditions: in bright sunlight or at night, for example, where the camera's built-in LCD screen is likely to give a false representation of a scene's exposure.
Preparing your images for printing is another area where you should observe the histogram. Paying attention to the left and right edges of the graph, note the exclamation mark to indicate lost details in either the dark or light tones. When printed, those areas would be pure black or white, respectively, which isn't desirable.
To ensure details are preserved, and the appropriate tonal range is present in your photos, experiment with the Levels and Curves adjustments.