Grids

A non-printing, non-exporting grid can be displayed on your page to help you lay out layer content more accurately.

Grids
Pixel grid showing at a higher magnification level.

Grids can be automatic or fixed—the former (as default) changes the frequency of grid subdivisions as you zoom in/zoom out, the latter always keeps the grid frequency constant (irrespective of zoom level).

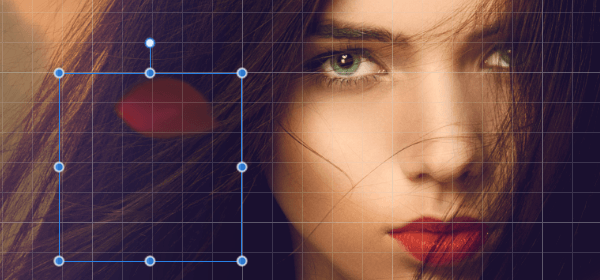
Both grids are overlaid over your page and work best when combined with snapping, in particular when the Snap to Grid option is enabled. They will line up perfectly with rulers (when switched on) and, to alleviate poor contrast in some designs, can have a different colour from the default grey colour.

To show or hide the automatic grid:
Zoom Tool To adjust automatic grid spacing:

With the Zoom Tool selected, do one of the following:

At all zoom levels the grid shows as grid 'blocks' further split into grid subdivisions.

To create a fixed square grid:
  1. From the View menu, select Grid and Axis.
  2. Select Basic mode.
  3. Set the Spacing and Divisions values.
  4. Click Close.
To show or hide the fixed square grid:
To customise grid colour/opacity:
  1. From the View menu, select Grid and Axis.
  2. Click the Grid lines or Subdivision lines swatch to display a pop-up panel to set the line colour(s).
  3. Drag the sliders to set the opacity of either, or both, line colours.
  4. Click Close.
To create a rectangular grid:
  1. From the View menu, select Grid and Axis.
  2. Select Advanced and uncheck Uniform.
  3. Do one of the following:
    • Set the Spacing and Divisions for the first and second axis.
    • Select Fixed aspect ratio, set the Spacing and Divisions for the first axis and then set the Aspect ratio and Divisions for the second axis.
  4. Click Close.
To create a fixed angular grid:
  1. From the View menu, select Grid and Axis.
  2. Select Advanced.
  3. From the Grid type pop-up menu, select Two axis custom.
  4. Set the Angle of either axis.
  5. Click Close.

Presets

To make grid setup quick and easy, one of several grid presets can be chosen depending on how you plan to work.

To select a preset:
  1. From the View menu, select Grid and Axis.
  2. From the Preset pop-up menu, select a preset.
To customise a preset:
  1. From the View menu, select Grid and Axis.
  2. Select a preset on which to base your new grid options.
  3. Check individual options on/off to override the current preset's options.

The options will be in effect immediately.

Presets menu To save as a custom preset for future use:
  1. Click the button adjacent to the Preset pop-up menu.
  2. Select Create preset.

The custom preset is in effect immediately.

About pixel grid

When working with images at large magnification levels, zooming in an undetermined amount, a pixel grid serves as a handy visual aid. Pixel art, detail retouching and working with selections are just some examples of its use. A different grid colour can also aid work where there is little colour variance in the image.

To create a pixel grid:
  1. From the View menu, do one of the following:
    • Select Show Pixel Grid.
    • Select Grid and Axis. In the dialog, check Show pixel grid.
  2. Optionally, for the latter option, modify Pixel grid lines colour for better grid visibility.

SEE ALSO: