Patching

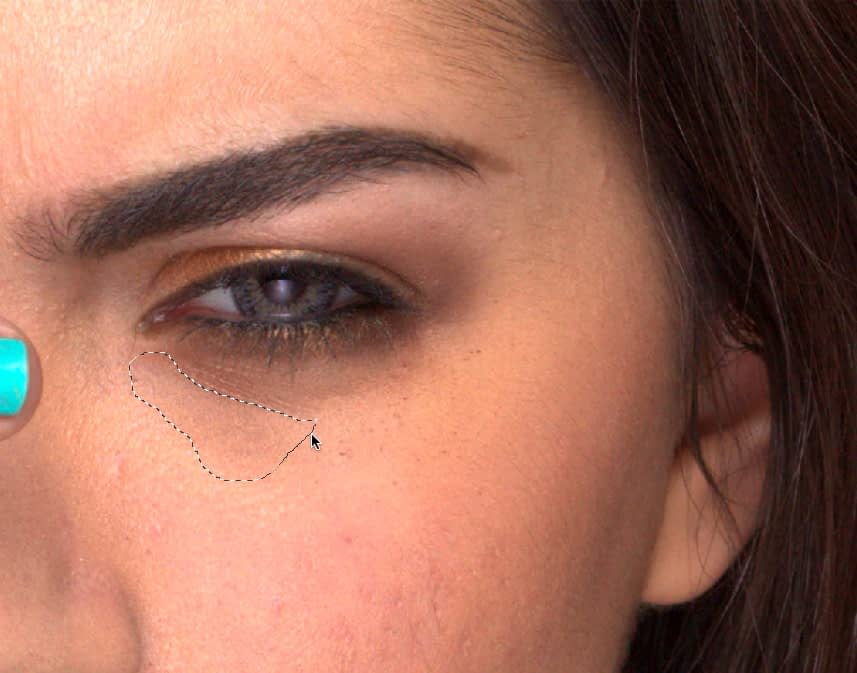
Patching is a retouching technique which involves replacing an undesirable pixel region with a patch (a drawn freehand selection area) made up of pixels sourced from another, more suitable, part of your image or another document.

Before
After
Patching out an extensive mascara smudge enclosed within the patch's freehand selection area.

About patching

Patching, like healing, blends the target pixels with the sample pixels by matching the texture, tone, and transparency of the sample pixels with the target pixels. For effective results, colors in the source and target areas should vary slowly to help create a seamless boundary that blends into the target's surroundings.

Take care to avoid including in your source sharp edges where color changes dramatically, which can introduce unwanted color tinges at the target.

When patching, the context toolbar offers options to apply only the texture of the source to the target, and to apply a level of transparency so the target and source pixels are blended together.

Selection

The selection can act as any of the following:

Global source

You can define a source in one open document and paint the sampled pixels into another open document using Set Global Source.

Once a source is defined, the Global source option becomes available from the layer selection pop-up menu. It will remain available until a new source is defined, even if the original global source document is closed.

Patch To patch when selection is target:
  1. Use the Layers panel to either select an existing pixel layer to copy to, or to create a new pixel layer.
  2. Select the Patch Tool from the Tools panel.
  3. Drag on the image to draw a freehand selection area. This will be the target area.
  4. Adjust the context toolbar settings. Repeat the above step if necessary.
  5. Click on the image to define the source area.
  6. (Optional) Drag the nodes of the applied area to modify the scale and rotation. Alternatively, use the Scale and Rotation controls on the context toolbar, or use the up and down arrow keys to control scale and the left and right arrow keys to control rotation.
  7. Click anywhere on the image to confirm placement and remove the selection.
Patch To patch when selection is source:
  1. Use the Layers panel to either select an existing pixel layer to copy to, or to create a new pixel layer.
  2. Click the Patch Tool.
  3. On the context toolbar, select Selection is source.
  4. Drag on the image to define a selection. This will be the source area.
  5. Adjust the context toolbar settings. Repeat the above step if necessary.
  6. Click on the image to place pixels from the source area.
  7. (Optional) Drag the nodes of the applied area to modify the scale and rotation. Alternatively, use the Scale and Rotation controls on the context toolbar, or use the up and down arrow keys to control scale and the left and right arrow keys to control rotation.
Patch To patch from a global source:
  1. Open the image that you want to copy pixels from and use the Layers panel to select the pixel layer that you wish to copy from.
  2. Click the Patch Tool.
  3. On the context toolbar, select Selection is source.
  4. Drag on the image to define a selection. This will be the global source area.
  5. On the context toolbar, click Set Global Source.
  6. Open the image that you want to paint the sample into.
  7. Use the Layers panel to either select an existing pixel layer to copy to, or to create a new pixel layer.
  8. Click the Patch Tool.
  9. On the context toolbar:
    • Ensure Selection is source is still selected.
    • Select Global from the layer selection setting.
  10. Click on the image to place pixels from the source area.
  11. (Optional) Drag the nodes of the applied area to modify the scale and rotation. Alternatively, use the Scale and Rotation controls on the context toolbar, or use the up and down arrow keys to control scale and the left and right arrow keys to control rotation.

SEE ALSO: