The Fill Tool does a great job in drawing a simple colour gradient across your object. The created fill path can be edited directly on the object to introduce more than two colours along the gradient path, introduce opacity, noise, reposition added colours or control colour transitions.
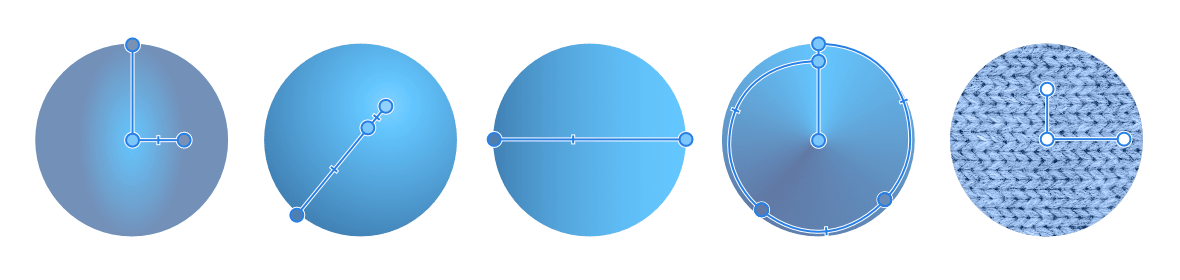
(From left to right) Elliptical, Radial, Linear, Conical, and Bitmap fill types applied to a basic shape.
Gradient settings
The following settings can be adjusted via the tool's context toolbar:
Apply to Fill—When enabled, the gradient is applied to the object's fill.
Apply to Stroke—When enabled, the gradient is applied to the object's stroke.
Type—determines the gradient type (Linear, Elliptical, Bitmap, etc.) via a pop-up menu. When you choose Bitmap you'll be asked for an image to act as your bitmap fill.
Rotate—the gradient is rotated anti-clockwise by 90° about its initially drawn stop.
Reverse—the end stop colours swap places. (Any intermediate stops are also repositioned accordingly.)
Aspect—if this option is off (default), the end stops can be resized separately which changes aspect ratio. When selected, the end stops are locked to keep the aspect ratio (i.e., changing one will automatically update the other). This setting affects only Elliptical and Bitmap fills.
Delete—if the gradient has intermediate points, this will delete the selected stop. If not, this will simply delete the gradient.
To draw a gradient:
Select an object.
From the Designer Persona, select the Fill Tool.
From the context toolbar, select either Apply to Fill or Apply to Stroke, and choose a gradient Type.
Drag the cursor across the object. This can be outside the object to start with.
Change the colour, opacity or noise of the selectable end stops using the Colour Studio. Selected stops display larger than other stops.
To create a bitmap fill:
Select an object.
From the Designer Persona, select the Fill Tool.
From the context toolbar, choose Bitmap from the Type menu.
A file browser window will appear, allowing you to select a file to be used as a bitmap fill.
To modify a gradient:
With the Fill Tool selected, select the object with a gradient fill applied and then do any of the following:
Tap on the gradient path to add a stop.
Drag a selected stop to reposition it along the gradient path. End stops can be repositioned (by dragging) to extend or contract the gradient's length; the angle of the gradient can also be changed by dragging.
Drag a mid point marker to adjust the spread of colours between two colour stops.