Whether you're using vector-based Pen, Pencil or brush tools, or pixel-based brush or retouch tools, you can simply connect your device and you're ready to go.
For mouse users, Affinity Designer lets your mouse become velocity sensitive by default. The same brush tools can be used but with simulated pressure sensitivity based on the speed (velocity) of your mouse movements.
This automatic response is governed by the brush controller which is set to automatic by default—it senses the type of input device and varies brush size, flow, etc. as you paint according to a particular input: 'Pressure', 'Velocity', 'Brush Defaults', or 'None'. If set to 'None', the brush is always a fixed size, flow setting, etc. Otherwise, the brush stroke properties will vary from a minimum to maximum amount (e.g. the full brush width).
While you get the response you need from either input, you'll still be able to fine-tune brush settings for pressure/velocity.
- For vector brush settings: jitter options let you control how brush size and flow are affected by your pressure-sensitive device or mouse.
- Pixel brush settings: as for vector brush options, but additional jitter options are provided that affect brush hardness, shape, colour, and the scatter and rotation of nozzles.
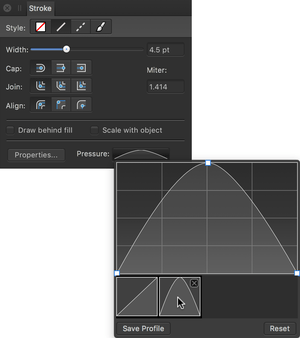
If you want to create a custom pressure profile that can be applied to a previously drawn stroke, you can design it and apply it from the Stroke panel. This can be optionally saved as is, or modified before saving.